
A new kitchen faucet can refresh your sink area and improve everyday function.
Installing a new kitchen faucet is one of those DIY projects that looks harder than it really is. With a few basic tools, a little patience, and the right steps, most homeowners can replace a kitchen faucet in an afternoon.
This guide walks you through the easy way to remove your old faucet and install a new one without unnecessary frustration.
Tools And Supplies You’ll Need
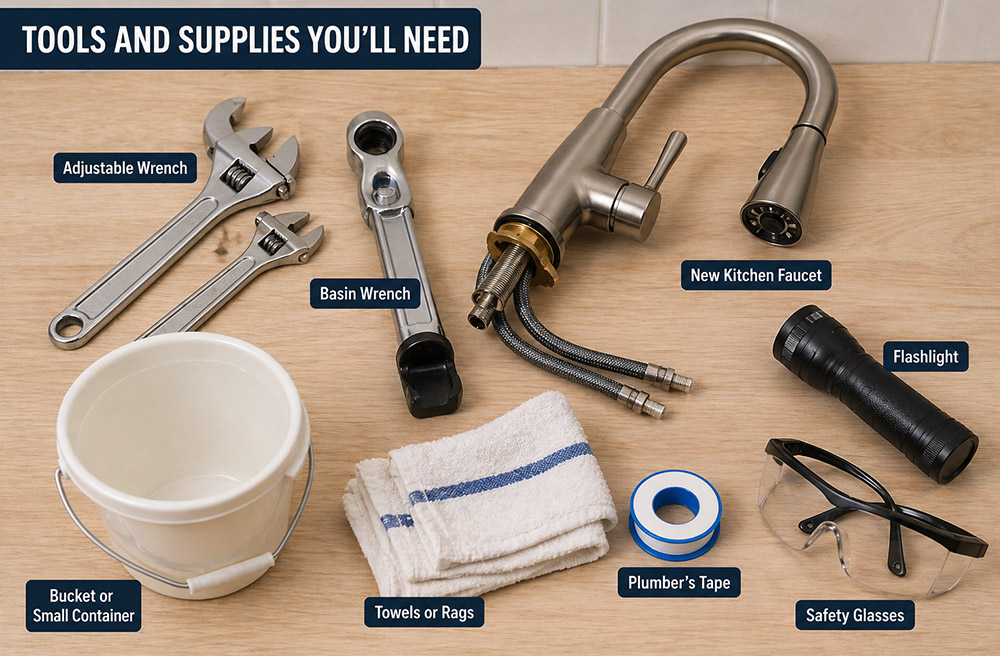
Gather everything before you start so the installation goes smoothly.
- New kitchen faucet
- Adjustable wrench
- Basin wrench
- Bucket or small container
- Towels or rags
- Plumber’s tape
- Flashlight
- Safety glasses
Before buying a new faucet, check how many mounting holes your sink or countertop has. Some faucets need one hole, while others require three or four. Many modern faucets include a deck plate to cover extra holes.
Step 1: Turn Off The Water Supply

If you are planning a wider refresh, kitchen island ideas is worth keeping open alongside this guide.
Always shut off the water before disconnecting the old faucet.
Look under the sink for the hot and cold water shutoff valves. Turn both valves clockwise until they stop.
After the valves are closed, turn on the faucet to release any remaining water pressure. Place a towel and bucket under the supply lines to catch drips.
Step 2: Disconnect The Old Faucet
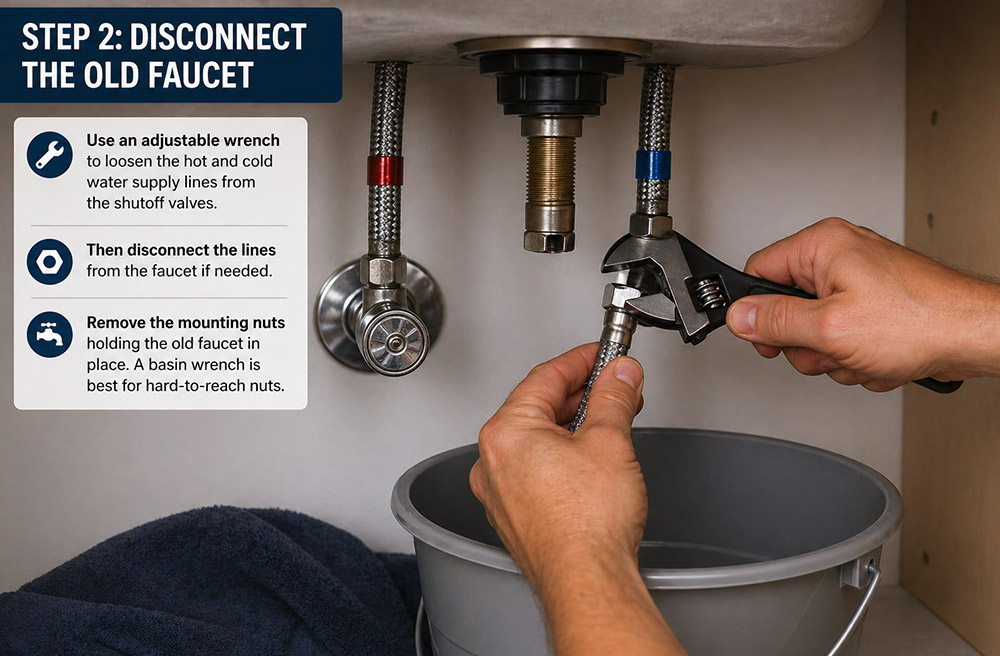
A basin wrench can make tight spaces under the sink much easier to reach.
Use an adjustable wrench to loosen the hot and cold water supply lines from the shutoff valves. Then disconnect the lines from the faucet if needed.
Next, remove the mounting nuts holding the old faucet in place. These are usually located directly underneath the sink. If they are hard to reach, a basin wrench is the best tool for the job.
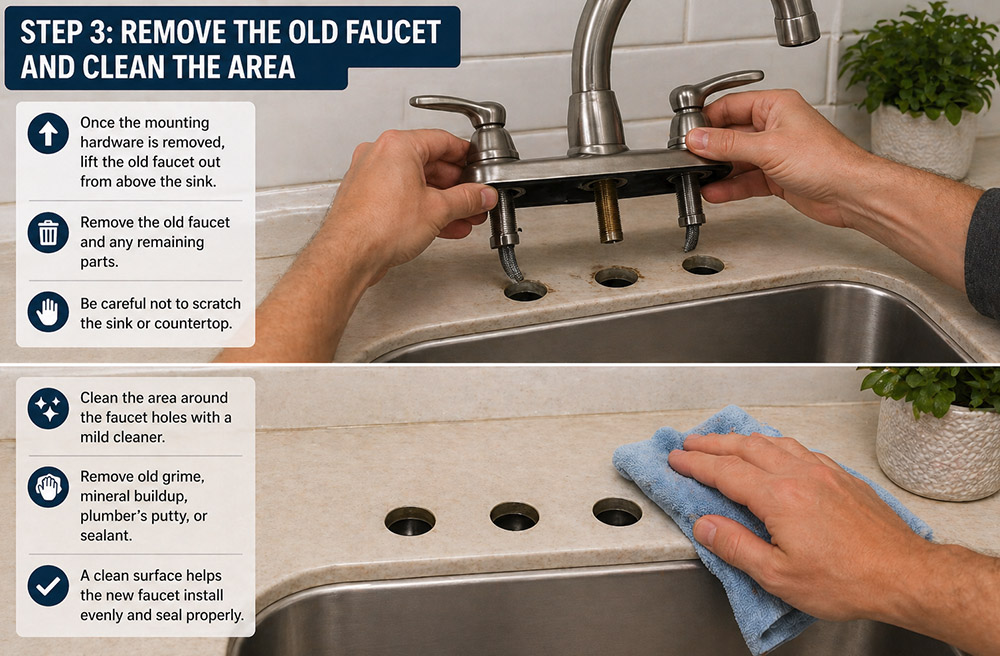
Step 3: Remove The Old Faucet And Clean The Area
You can also borrow details from kitchen backsplash ideas when you are refining the final look.
Cleaning the mounting area helps the new faucet sit flat and seal properly. Once the mounting hardware is removed, lift the old faucet out from above the sink.
Clean the area around the faucet holes with a mild cleaner. Remove old grime, mineral buildup, plumber’s putty, or sealant. A clean surface helps the new faucet install evenly.
Step 4: Install The New Faucet
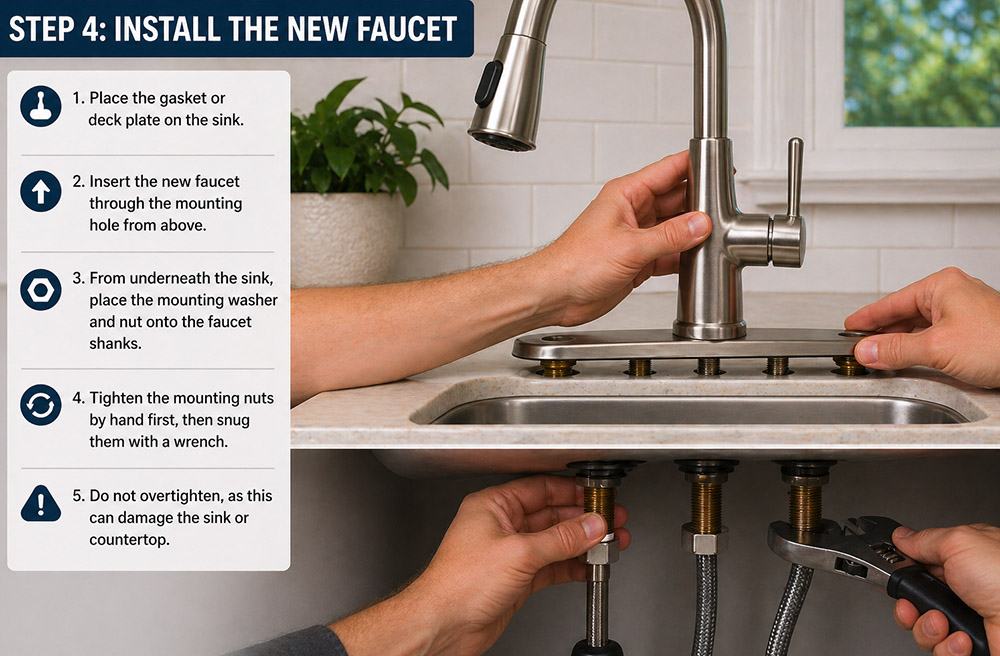
Follow the faucet manufacturer’s instructions for gasket and mounting hardware placement.
Place the gasket or deck plate onto the sink, depending on your faucet style. Insert the new faucet through the mounting hole from above.
From underneath the sink, attach the mounting washers and nuts. Tighten them by hand first, then snug them with a wrench. Do not overtighten, as this can damage the sink or countertop.
Step 5: Connect The Water Lines
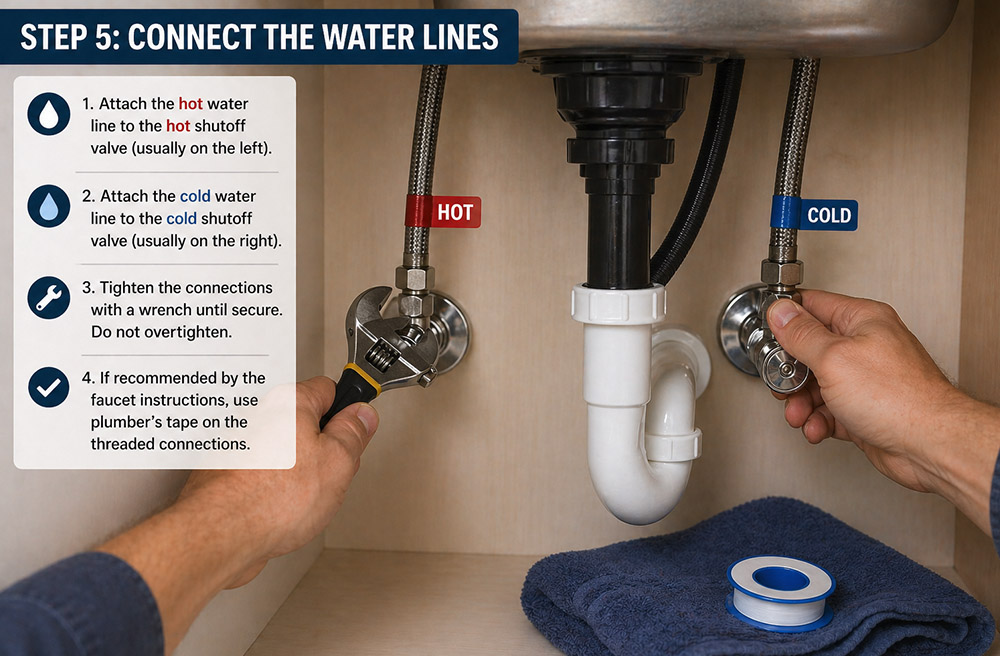
Make sure the hot and cold lines are connected to the correct valves.
Connect the faucet supply lines to the shutoff valves. Hot water usually connects on the left, and cold water connects on the right.
For a related idea you can adapt in the same space, see DIY floating kitchen shelves.
If the faucet instructions recommend plumber’s tape, wrap it around the threaded connections before tightening. Tighten each connection until secure, but avoid forcing it.
Step 6: Check For Leaks
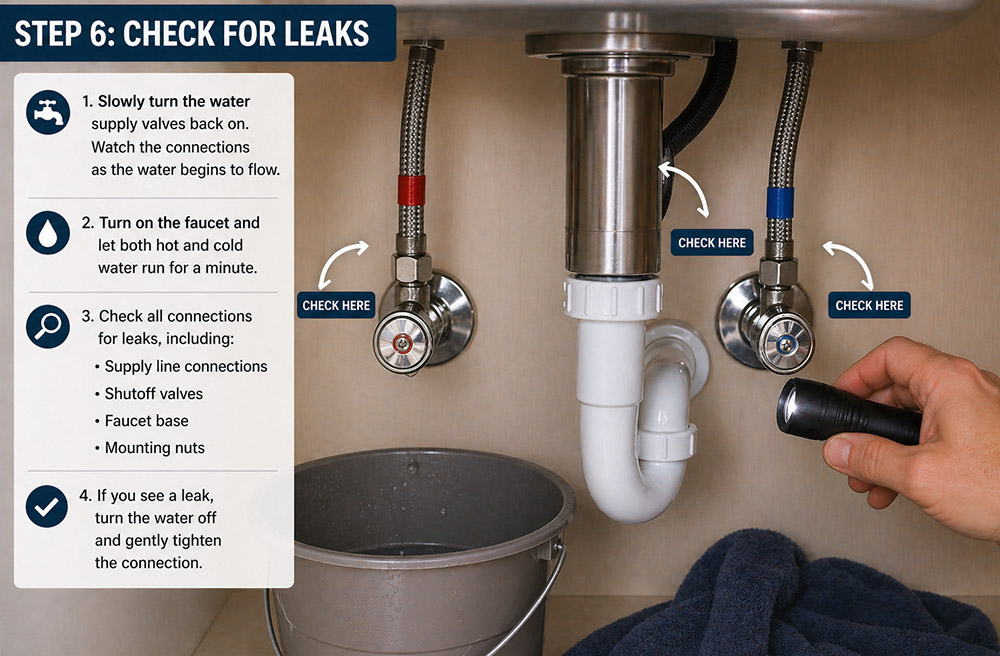
Check every connection carefully before putting items back under the sink.
Slowly turn the water supply valves back on. Watch the connections under the sink as the water begins to flow.
Turn on the faucet and let both hot and cold water run for a minute. Check for drips around the supply lines, mounting area, and faucet base. If you see a leak, turn the water off and gently tighten the connection.
Step 7: Flush The Faucet
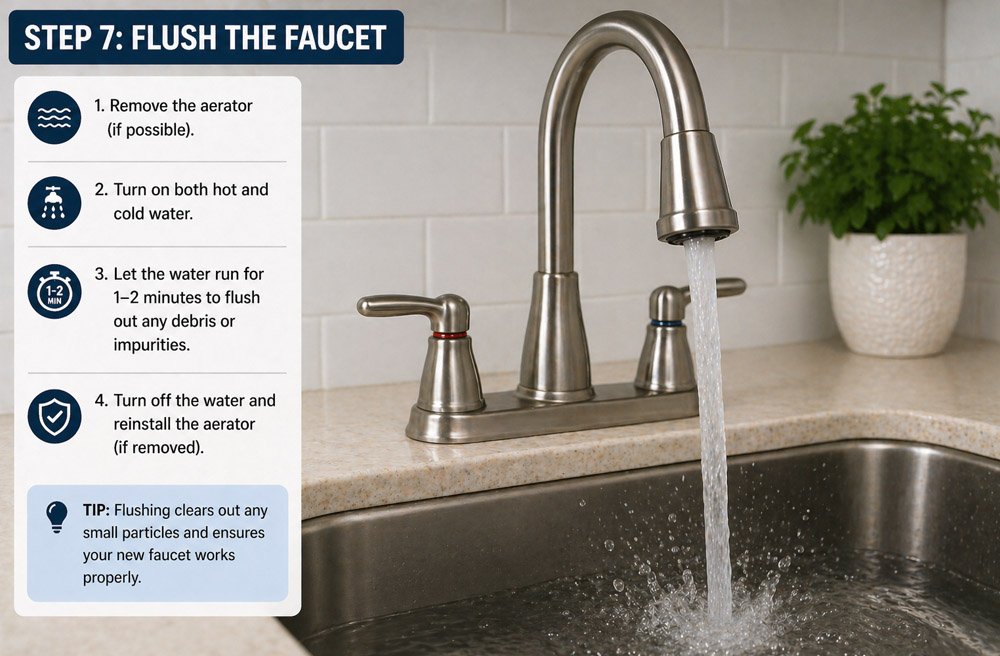
Flushing the faucet clears debris from the lines before regular use.
A useful next read is open kitchen shelves if you want another angle on this part of the project.
Remove the aerator from the faucet tip if your model allows it. Run the water for a few minutes to flush out any debris from the lines.
After flushing, reinstall the aerator and test the faucet again. Check the spray function, handle movement, and water temperature.
Common Mistakes To Avoid
A quick final inspection can prevent small issues from becoming bigger problems.
- Forgetting to turn off the water first
- Buying a faucet that does not match the sink hole layout
- Overtightening mounting nuts or water lines
- Skipping the leak check
- Not flushing the faucet before use
Final Thoughts
A simple faucet replacement can make your kitchen feel cleaner, newer, and more functional.
Installing a new kitchen faucet is a manageable DIY project when you take it step by step. The key is preparation: choose the right faucet, shut off the water, keep towels nearby, and check your work carefully before finishing.
With the new faucet installed, your kitchen sink will look better and work better without needing a major renovation.